On this page
group_add
Managing Group Members
Add and remove users, groups, and client secrets from groups
Managing Group Members
Groups can contain three types of entities: users, other groups (nested), and client secrets. This guide covers adding and removing members.
Accessing Member Management
There are two ways to access the member management interface:
Option 1: From the Groups Table
In the groups table, click the people icon in the “Actions” column for the group you want to manage.
Option 2: From the Group Details
- Open the group by clicking on its name
- In “Quick Actions”, click “Manage Members”
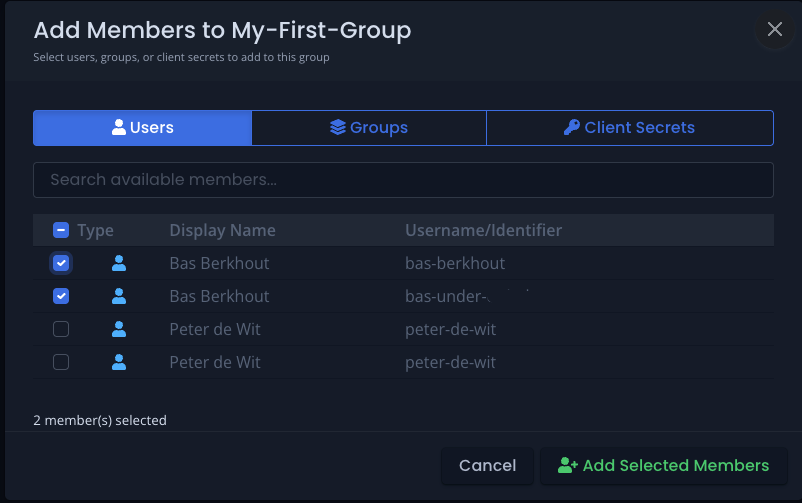
Adding Members
-
Click the “Add Members” button
-
A modal opens with three tabs:
- Users - Add individual users to the group
- Groups - Add other groups (creates nested groups)
- Client Secrets - Add client secrets to the group
Click the image to enlarge
Selection Rules
- Only eligible entities appear in the tables (entities not already in the group)
- You can only add one entity type per operation (users OR groups OR client secrets)
- Select one or more entities of the same type
- Click “Add Selected Members” to confirm
The selected entities are immediately added to the group and inherit the group’s organization role.
Removing Members
- Access the group using either method described above
- In the members table, select the entity or entities you want to remove
- Click the “Remove Selected” button
- Confirm the removal
Removal Notes
- You can remove multiple entity types at once (unlike adding members)
- Removed entities lose the permissions granted by this group
- If an entity belongs to multiple groups, they retain permissions from other groups
- This action is immediate and cannot be undone
When removing a user or client secret from a group, verify they have the necessary access through other groups or direct permissions if they need continued access.
Member Visibility
The members table shows:
- Entity name
- Entity type (User, Group, or Client Secret)
- When the entity was added to the group
Nested groups display with a group icon to distinguish them from individual users.